Written by Yinako Minako
아래그림과같은 Non photo realistic shading의 효과를 만들기위해서 Maya에서 nprs.mel의 간단한 shading
network을 사용해 본다.
nprs.mel 받기
[Part1 before getting started]
nprs을 사용하는데 있어서 유의해야할점은 각 scene마다 모든 라이트들의 intensity의 합을 동일하게 해야한다.
예를 들어 한 scene에서 3개의 라이트를 사용하고 모든 라이트의 intensity의 합을 1로 셋팅을 하였다.
그러면 다른 scene에서 10개의 라이트를 사용하고 싶다면 모든 라이트의 intensity의 합이 1이되도록 각 라이트의 intensity의
값을 조정해 주어야한다.
보통 1개의 라이트를 사용하여도 좋은 효과를 낼수있으며 nprs에서 ramp을 이용하여 object의 밝기를 조절할수 있다.
[Part2 install and execute nprs]
nprs을 사용하기위해서는 nprs.mel을 Maya scripts directory에 옮겨놓는다.
(C:Documents and SettingsAMy DocumentsMaya4.0scripts) 여기서 A는 각자의 user
name이다.
Maya을 실행시킨후 Maya command line 또는 script editor에서 nprs을 실행시키면 된다.
그러면 아래와같은 window가 생길것이다.
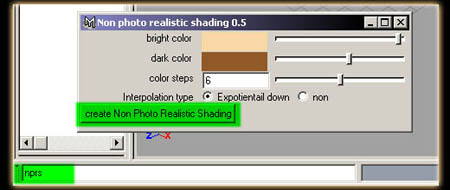
bright color - shaded object의 가장밝은 부분의 color
dark color - shaded object의 가장 어두운 부분의 color
color steps - bright color와 dark color사이의 color의 갯수
interpolation type - non은 cell shader의 느낌을 주며 Expotiential down은 color의 경계부분을
부드럽게 해준다.
create Non Photo Realistic Shading을 클릭하면 아래와같은 shading network가 생긴다.
[Part3 working with nprs]

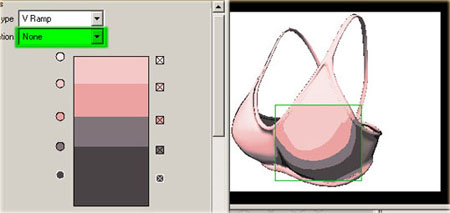
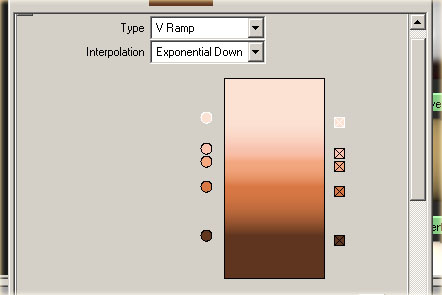
위의 shading network의 color_steps ramp을 선택하면 아래그림과 같이 보여질것이다.
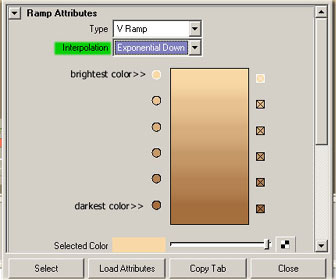
윗부분의 가장 밝은색과 아래부분의 가장 어두운색을 포함하여 6개의 "color steps"을 볼수있다.
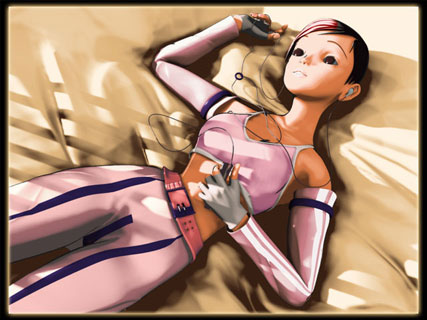
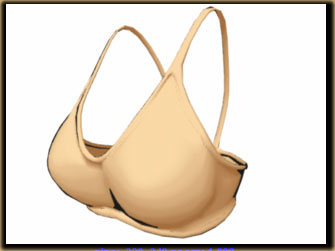
아래 이미지는 nprs의 default setting을 적용한것으로 intensity가 1인 한개의 라이트를 사용한것이다.
ramp에서의 color의 종류선택과 위치변화는 object의 color와 라이트의 밝기에 영향을 준다.
위의 이미지처럼 interpolation을 non으로 하면 cell shader의 느낌을 줄수 있다.
그리고 Maya의 IPR을 사용하면서 color ramp을 조절하면 각자 원하는 효과를 얻을수 있다.
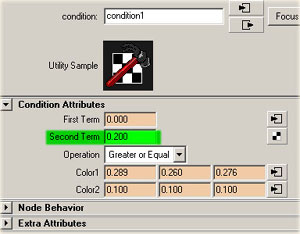
object주위의 검은 경계선을 원하지 않으면 condition node의 second term의 값을 0으로 해주면 된다.
반대로 second term의 값을 올려주면 경계선이 두꺼워진다.
[Part4 Tips]
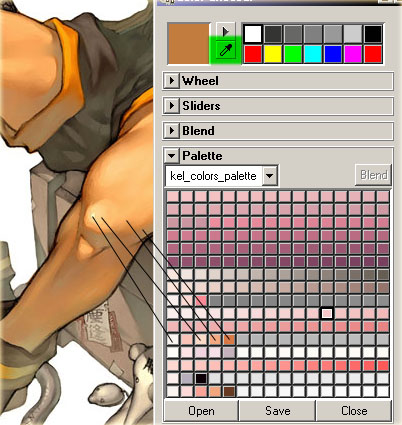
위의 그림처럼 참고이미지에 color picker을 이용하여 원하는 colors을 얻을수있다.
위의 color ramp처럼 각자 원하는 효과를 위해 color의 종류와 위치를 바꾸어 준다.